A solar project’s 25-year lifespan depends entirely on what connects it to the roof. Choosing the wrong solar panel roof mounts can lead to leaks, structural failure, and catastrophic project failure. As a solar engineer, you’re not just specifying a part; you’re guaranteeing the structural integrity and waterproofing of a client’s building for decades.
Busy engineers and project managers don’t have time for a sales pitch. You need a clear, repeatable framework for selection. Here it is.
Key Takeaway
- Assess the Roof: Is it pitched or flat? What is the material (e.g., Colorbond, concrete tile, terracotta)?
- Analyse the Environment: What are the local wind load requirements as per AS/NZS 1170.2?
- Select System Architecture: Based on the roof and environment, choose the best roof mounting system for solar (e.g., railed, rail-less, ballasted, or hybrid).
- Verify Compatibility: Ensure the system is compatible with your chosen module (and its clamping zones), is certified for Australian conditions, and complies with all Clean Energy Council (CEC) guidelines for fire setbacks and access.
This guide will walk you through this professional framework, step-by-step, to help you specify the right roof mounting system for any roof, every time.
Understanding the Pitched vs. Flat Roof Decision First
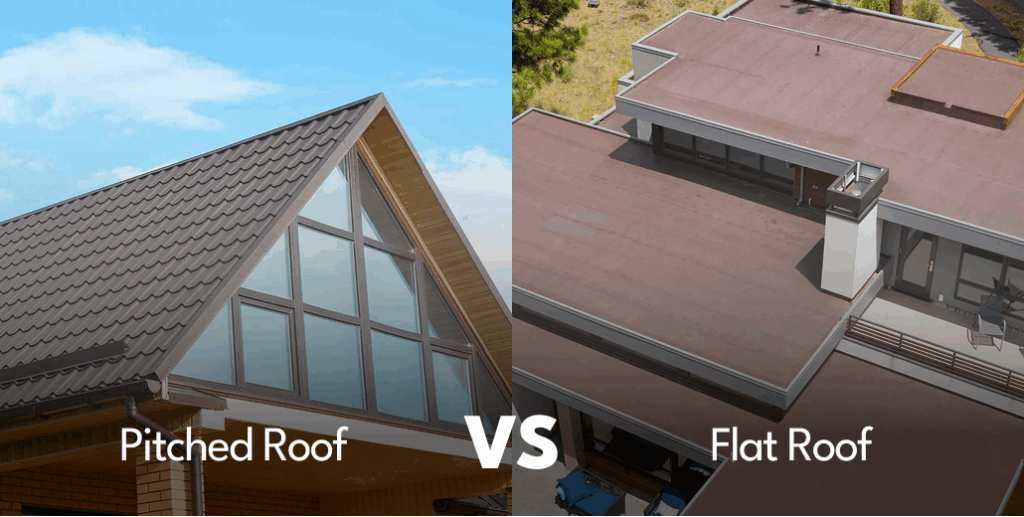
The first fork in the road is simple: is the roof pitched or flat? The engineering principles for mounting solar panels on a roof are completely different for each.
- Pitched Roofs (Residential/Commercial): This is the vast majority of Australian homes and many commercial buildings. The focus is on penetrations, waterproofing (flashing), and structural attachments to the trusses or battens.
- Flat Roofs (Commercial/Industrial): Common on large warehouses, shopping centres, and office blocks. The focus is on load distribution, using ballasted solar mounting systems or tilted solar systems, and protecting the roof membrane.
This article will break down each of them.
Selecting Mounts for Pitched Roofs
This is the most common scenario for many installers, especially across Australia’s residential and commercial suburbs. The key to getting this right is matching the attachment method to the specific roof material.
Step 1 – Match the Mount to the Roof Material
In Australia, we primarily deal with metal and tile. Each has a non-negotiable, correct method for attachment.
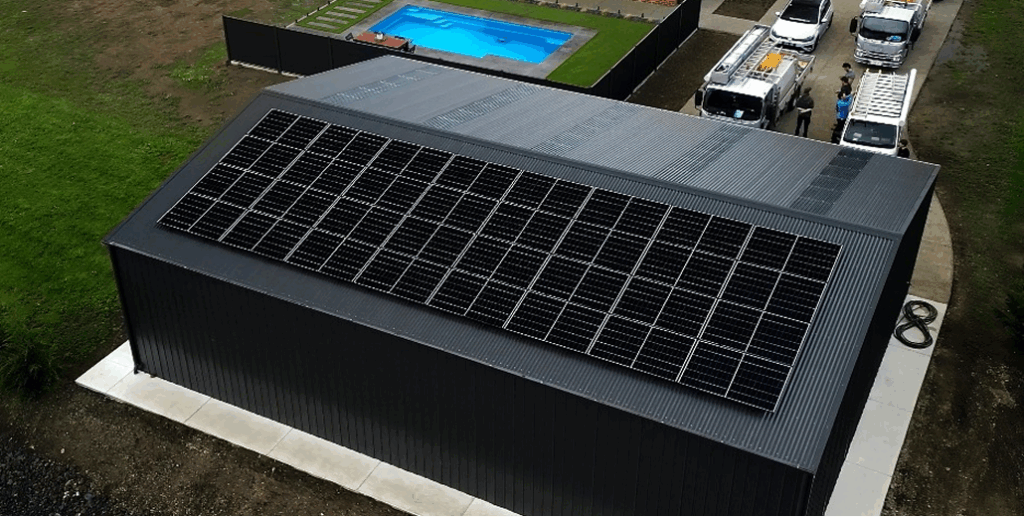
Metal Roofs (Colorbond, Trimdek, Kliplok)
This is the most common roof type for both new homes and commercial sheds.
- Corrugated / Trimdek: These profiles require a bracket that penetrates the sheet and fixes directly into the purlin or rafter below. The bracket (like an L-bracket) uses an EPDM-backed screw to create a weatherproof seal.
- Standing Seam (Kliplok, etc.): Never, ever penetrate a standing seam roof. Doing so voids the roof’s warranty and creates a leak path. The correct solution is a non-penetrating seam clamp(like our NOVA mini kliplok clamp and NOVA longline clamps) that grips the seam, allowing you to attach rails without a single hole. They cost more, but they’re the only professional solution.
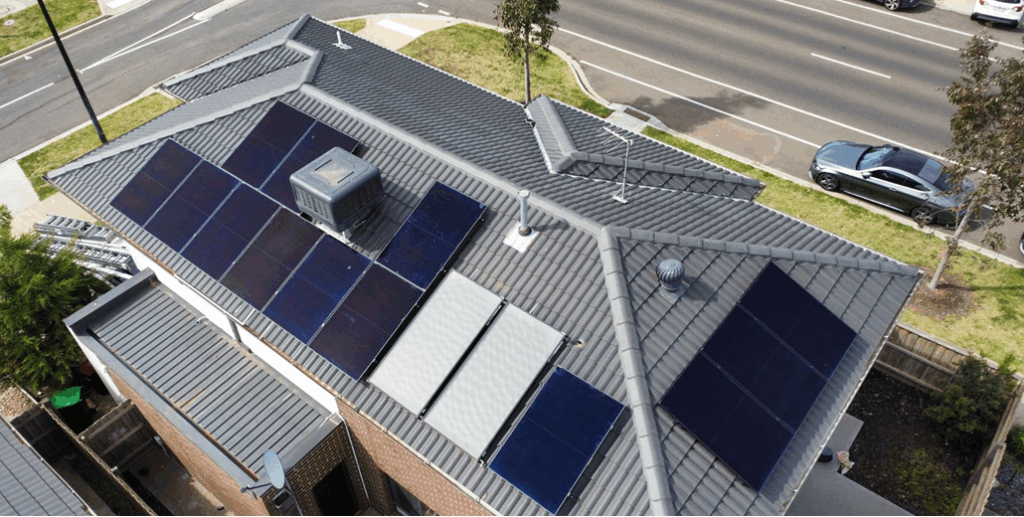
Tile Roofs (Terracotta & Concrete)
These are the most complex to work on, as the tiles are brittle and are themselves a waterproofing system.
- Tile Hooks: This is the most common method. The installer slides the tile up, secures a stainless steel hook directly to the rafter (never just the batten), and then slides the tile back down. The hook protrudes from between the tiles.
NOVA have its own tile roof solar mounting system available off the shelf.
- Tile Replacement Mounts: These are essentially a metal flashing shaped exactly like a tile (e.g., a “tile-replacement” flashing) with an integrated standoff. You remove one tile and replace it with this metal unit. It’s robust and offers excellent waterproofing.
- Stand-offs: This involves removing a tile, installing a dedicated stand-off with a large flashing onto the roof deck/rafter, and then grinding the tile to fit neatly around the stand-off. It’s labour-intensive but incredibly strong and watertight.
Asphalt Shingle / Decking
Less common in Australia, but seen on some US-style homes. The key is simple: you must hit the rafters with your lag bolts. Never fix just to the plywood or OSB decking. A dedicated flashing must be slid under the shingle above the penetration to maintain the roof’s water-shedding properties.
Engineer’s Corner: Field Note on Tile Roofs
In my years managing solar projects, the single biggest mistake I’ve seen is installers trying to “waterproof” a tile hook penetration with silicone or, even worse, expansion foam. This will fail. The foam degrades under UV, cracks, and channels water directly to your screw penetration. The only correct way is to use a proper, engineered tile hook or flashing system that relies on gravity and mechanical diversion, not a chemical seal. Also, never use an impact driver to tighten the hook’s rafter screw, you’ll crack the tile below nine times out of ten.
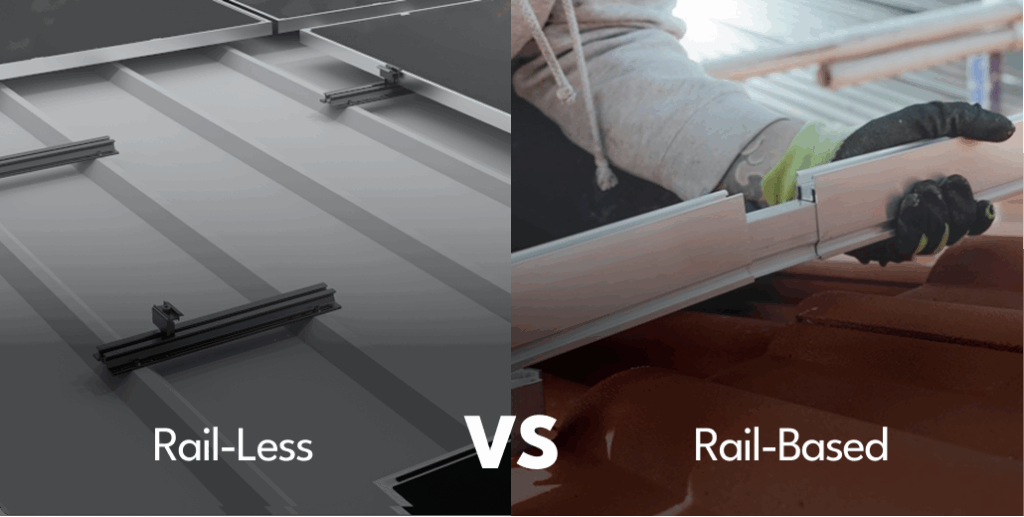
Step 2 – Choose Your System Architecture between Railed and Rail-Less
Once you’ve sorted your roof attachment, you choose the system that holds the panels.
- Railed Systems: The traditional method. You attach rails to your roof attachments, then clamp the panels to the rails.
- Rail-Less Systems: These systems use individual mounting blocks or “pucks” that attach directly to the roof fixings. The modules then clamp directly to these blocks.
Here is a quick comparison for your project managers:
| Feature | Railed Systems | Rail-Less Systems |
| Labour Speed | Slower (requires rail assembly & levelling) | Faster (fewer components, less levelling) |
| Material Cost | Higher (long lengths of aluminium) | Lower (less material) |
| Flexibility | High. Can easily span uneven roof planes. | Low. Relies on a perfectly flat roof plane. |
| Inventory | More SKUs (rails, joiners, clamps) | Fewer SKUs to manage on the truck. |
| Aesthetics | More visible (higher profile) | Sleeker, lower profile. |
| Grounding | Simple (rails create the bond) | More complex (each block may need grounding). |
Step 3 – Don’t Overlook Flashing and Attachments
This is where you build trust and a 25-year asset. Here in Melbourne, where we can get four seasons in one day, a bad penetration will leak.
- Flashing: This is the waterproofing component. Its job is to mechanically divert water over and around the penetration. It’s the tile replacement, the butyl-backed L-foot, or the standing seam clamp.
- Attachment: This is the structural component. It’s the rafter screw or the purlin bolt. Its job is to handle the wind uplift and shear loads.

A note on “flashing-less” mounts (common on metal roofs): These systems use a thick butyl mastic pad on the L-bracket. They are fast and effective if installed perfectly. That means the surface must be 100% clean, dry, and free of dust, a big ask on a real-world roof.
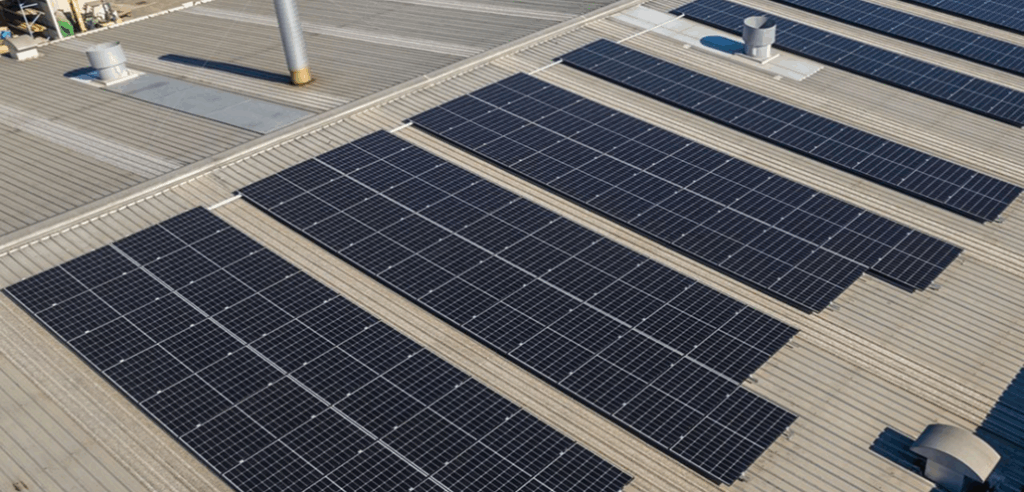
Selecting Mounts for Flat Roofs (Commercial)
This is a different engineering challenge. It’s not about rafters; it’s about structural loads in kilograms per square metre.
Ballasted vs. Mechanically Attached Systems
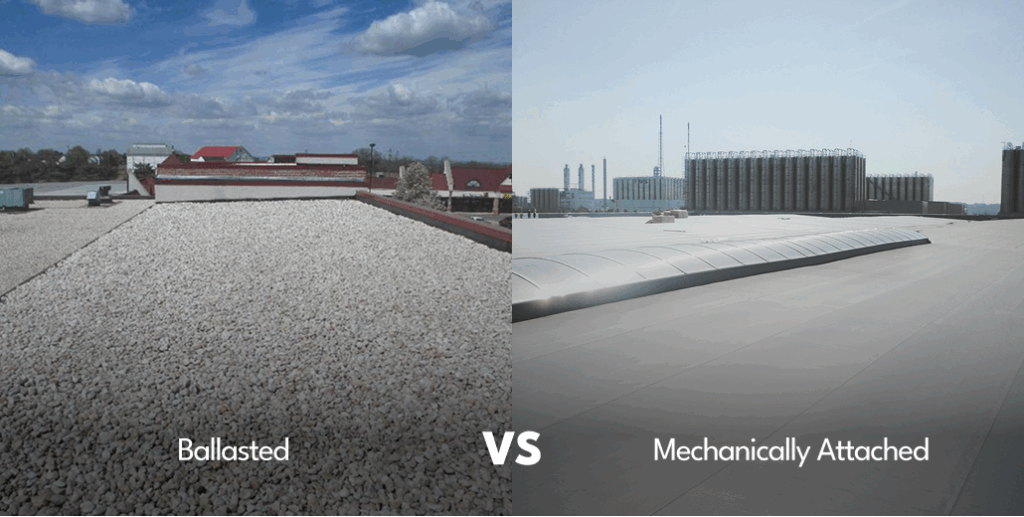
- Ballasted Systems:
- How they work: Use high-density concrete blocks to hold a “floating” array in place using gravity and friction.
- Pros: No (or very few) roof penetrations. This is a massive win for building owners concerned about their roof membrane warranty. Very fast to install.
- Cons: Extremely heavy. The roof structure must be certified to handle the high distributed load (often 15-25 kg/m²).
- Key factors: Requires a wind engineering report (often CFD analysis) and a compatible slip-sheet to protect the roof membrane (e.g., TPO, PVC).
NOVA is able to provide this with our engineering partner, reach out to us for more details.
- Mechanically Attached (Penetrating) Systems:
- How they work: The system is anchored with stand-offs directly to the building’s structural steel or purlins.
- Pros: Very light system weight. It’s the only choice for high-wind-load areas (cyclonic regions) or on roofs that cannot support a ballasted load.
- Cons: Involves penetrating the roof membrane. This requires meticulous coordination with a roofer to install “boots” or flashing to ensure a long-term, warrantable seal.
Engineer’s Corner: Pro Tip for Flat Roofs
Always, always get a structural engineer’s report before you even quote a ballasted system. I’ve seen teams get all their gear to site only to be told by the building manager that the 30-year-old C&I roof can’t handle the load. That’s a costly, reputation-damaging mistake. The structural sign-off is your first and most important document.
Essential Engineering & Compliance Factors (The “Paperwork”)
This section moves from “what to use” to “how to prove it’s right” for Australian standards. This is non-negotiable for creating STCs and passing inspections.
Structural Integrity: Wind & Snow Loads
This isn’t optional; it’s a legal requirement of your design.
- The standard you must live by is AS/NZS 1170.2:2021 (Structural design actions – Part 2: Wind actions).
- This standard determines your Wind Region (e.g., Region A for most of metro Australia, Region C/D for cyclonic areas) and your Terrain Category.
- Your mounting system manufacturer (e.g., Clenergy, Radiant, Sunlock, Schletter) must provide you with engineering tables or a design calculator based on these inputs. This document certifies that their system, when installed to their specs (e.g., rafter spacing, attachment points), complies with AS/NZS 1170.2 for that specific site.
Navigating Building Codes & Fire Setbacks
Your installation must comply with local council rules, but the two main documents are:
- AS/NZS 5033:2021 (Installation of PV arrays): This is the primary Australian standard for installation safety. It governs everything from DC voltage to cable management and mechanical security.
- Clean Energy Council (CEC) Guidelines: To be eligible for STCs, you must follow the CEC’s design and installation guidelines. This includes critical fire setbacks, for example, the required 600mm access pathways from the apex/ridge and gables to allow firefighter access. Your mounting layout must account for this.
Module and Inverter Compatibility
A final check:
- Module Clamps: Is the clamp (mid or end) certified for the frame height of your chosen module (e.g., 30mm, 32mm, 35mm)? Using the wrong clamp can damage the panel or create a weak fixing.
- MLPE & Wire Management: How does the mounting system accommodate microinverters or optimisers (MLPEs)? Does it have integrated cable trays, clips, or channels? Leaving DC cables resting on the roof is a defect and a major failure risk. A good roof mounting system makes wire management easy.
Your Framework for a 25-Year Asset
Choosing the right solar panel roof mounts isn’t about finding the cheapest bracket. It’s a systematic engineering process that balances the roof type, environmental loads, system architecture, and code compliance.
Your framework is clear:
- Roof Type (Colorbond, Tile, Flat)
- Environment (AS/NZS 1170.2)
- System (Railed, Ballasted, etc.)
- Compliance (AS/NZS 5033 & CEC)
The best mounting system is one that is properly engineered, installed to manufacturer specs, and backed by a warranty that gives both you and the building owner peace of mind. Never cut corners on the hardware that holds a 25-year asset in place.
If you’re stuck on a complex project, having trouble sourcing the right components for a difficult roof, or just want a second opinion, reach out to our team. We’re more than happy to support
Frequently Asked Questions (FAQ)
Q: Can I mix solar mounting components from different manufacturers?
A: No, you should never do this. A mounting system’s engineering certification (for AS/NZS 1170.2) is based on the entire system as sold by the manufacturer. If you mix one brand’s rails with another brand’s clamps and a third brand’s L-feet, you void all warranties, and more importantly, you void the structural certification. In an audit or insurance claim, your installation would be deemed non-compliant.
Q: What’s the most common reason a mounting system fails inspection in Australia?
A: From my experience, the top reasons are:
- Improper Roof Attachments: Missing rafters or purlins. The pull-out strength from decking alone is almost zero and is a guaranteed failure.
- Incorrect Fire Setbacks: Failing to leave the CEC-mandated access pathways for firefighters.
- Poor Wire Management: DC cables left resting on the roof surface or in standing water, which is a breach of AS/NZS 5033 and a major fire risk.
- Improper Flashing: Using silicone as the primary waterproofing method instead of a correct mechanical flashing.
Q: How important is the torque spec on clamps and bolts?
A: Critically important. It’s not a ‘good-to-have’, it’s a requirement.
- Under-torquing: The clamps won’t have the correct grip. In a high-wind event, this can lead to micro-vibrations, loosening, and eventual panel loss (where the panel flies off the roof).
- Over-torquing: This is just as bad. On a mid-clamp, you can create a pressure point that cracks the solar module glass. On a bolt, you can strip the thread or snap the head. Always use a calibrated torque wrench set to the manufacturer’s exact Newton-metre (Nm) specification.